| |
If your PC is connected to the network, you
can map a server on the network (a remote resource) to a drive on your
local system. When you map a drive, you associate a drive letter with a
path. It enables you to instantly jump to a destination without having to
go through a series of time-consuming steps. It saves you time and energy;
however, mapped drives can also cause some confusion. If you have a
‘Local’ profile, and use another machine on campus, you may find that
drive letters do not map to the same location as yours. If you switch to a
‘Roaming’ profile you won’t experience that problem.
To map a drive:
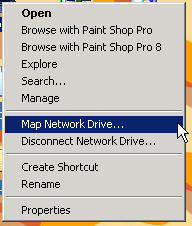
- Right click on the My Computer
icon on your desktop
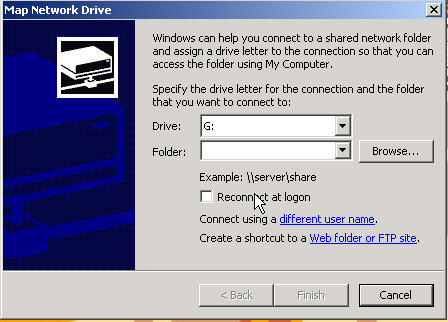
- Click on Map Network Drive... to
spawn the dialog box shown below

- Select any drive letter not in use

- Either browse for the folder or type in
the path. The path consists of three parts: a server name, a
share name, and an optional filename. These components are
combined with a backslash and adhere to this basic format:
\\servername\sharename\filename
Where ‘servername’ is the name of the network file
server, ‘sharename’ is the name of a network or shared folder and
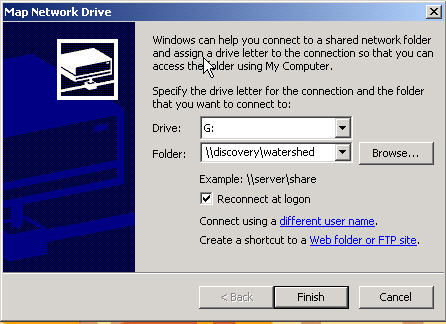
‘filename’ is the optional file path. For example, if I wanted to access
Watershed, a temporary storage space at Malaspina dedicated to large
files such as videos, I’d enter the following path:
In this case, ‘discovery’ is the server name and
‘watershed’ is the folder.

- Click on ‘Reconnect at logon’
if you want this mapped drive available every time you log on and click ‘Finish’
- In My Computer or Explorer you should now see a new
drive.
For further assistance with file storage matters,
please contact the IT Help Desk by phone at 314-596-8750.
|