Selecting Fast, Inexpensive
Optical Drives
What to Look For in a CD or DVD Drive and How to Install
To the hi-tech newcomer, the term optical drive may not mean very much.
Simply put, the optical drives read CDs and DVDs. Virtually every modern PC
contains an optical drive, used as a secondary storage medium for computers.
Information is stored on high-density disks in the form of tiny pits "read"
by laser. The term refers to the general category of disk drives that read
information optically, using a low-powered laser. CD-ROM drives were the
first optical units commonly found on PCs; they began as novelties for
high-end users and grew in popularity as they dropped in price and increased
in performance, until the point arrived where they were mandatory equipment
on any new PC system. Optical drives are storage devices and part of the
storage subsystem. They usually interface either through the standard
IDE/ATA controller ports on the motherboard, or a SCSI interface host
adapter. The optical drive in a system is an important factor in the PC's
ability to install and run software, since most software is distributed on
optical disks. In the case of writeable CD drives, they also are often the
only real backup devices in the PC.
Related Components: Optical drives
are most closely related to the sound card, to which they usually a physical
connection of some kind. Optical drives are also kin to the motherboard,
since they usually send data to the system through the mobo. When you
purchase an optical drive you want too match the interface that has been
chosen for the hard disk drive(s) in the system, usually IDE/ATA or SCSI.
Today we have not just CD-ROM drives but
their younger and higher-capacity siblings, DVD drives. We also have
writeable and rewriteable CD-ROM drives, called CD-R and CD-RW respectively.
These expand the capabilities of optical drives by letting you actually
write to CD-ROM media.
Adding a fast optical drive will increase
your PC’s flexibility and even if you’re on a budget, drives that read and
burn any format won’t put you in the poorhouse.
You can get it all done with only one drive. No worries whether your drive
supports DVD+RW or DVD-RW - for less than 100 bucks you can get an 8X DVD
combo drive that writes to all major formats of rewritable DVD.
The Need for Speed - How Much is
Optimal?
Almost all DVD burners are relatively fast. Even second-tier performers can
write an entire disk in less than 10 minutes. Plus, CD burning speeds are
fast enough that the difference between 48x and 52x isn’t much. In other
words, if you are on a budget there is no reason to pay big bucks for a 12x
or 16x DVD burner or insist on buying the fastest CD-RW drives you can find.
8X versus 12X - Consider the difference in Storage
What’s 12 inches in diameter and can hold 8.5 GB of data? A dual-layer DVD
disk. Most stand-alone DVD players can play the dual-layer discs that these
drives burn, boosting the amount of video that will fit on one disc. You’ll
pay a small price premium for early dual-layer drives, and compatible media
may be hard to find at first. Also, writing to dual-layer discs is slower
than writing to single-layer. - 2.4x for the double, as opposed to 8X, 12X
or 16X for the single layer. Good idea to wait until the prices of drives
and media fall before switching to dual-layer.
Adding an Extra Drive to an Older PC
One Cable - Two Drives/ Defining the Master and Slave Relationship
Unfortunately, this process often requires a bit more technology than merely
plugging in. Older PCs use parallel ATA technology - 2 drives share one
cable (known as a channel, and most PCs come with at least two IDE channels
for a maximum of 4 drives. Setting a jumper designates each drive as either
a master or a slave, which permits a single cable to connect two drives to
one IDE channel. The jumper settings for each designation are usually
labeled on the drive itself. A few simple rules should guide your
configuration choices. If possible, each drive should sit on its own IDE
channel configured as a master drive. If you have two drives on one channel
always make the faster drive the master drive. For example, suppose that you
wanted to add a second hard drive and a DVD burner to a PC equipped with one
hard drive and one CD-RW drive. IN that case, you would want to set the new
,f aster hard drive as master on the primary IDE channel. Your older hard
drive should be the slave drive on the primary channel, with the two optical
drives as master and slave on the secondary channel.
The X" Rated Component
Optical drives are normally specified with an "X" rating, intended to
represent the speed of the drive. For example, a CD-ROM drive may be
specified as "40X", or a DVD drive as "6X". This is supposed to mean that
these units operate at 40 times and 6 times the speed of the first CD-ROM
and DVD drives, respectively. These "X" ratings do indicate approximate
drive speed, but they have become "magic numbers" and don't really represent
as much of the performance picture as you might think. See the discussion of
"Magic Numbers" below. (Note that the CD and DVD standards are different; a
1X DVD drive actually has throughput of about eight times that of a 1X
CD-ROM drive.)
Installation - the Final Step
Installing your optical drives is an easy process that requires a bit of
attention to detail. Here’s an easy-to-follow-installation guide:
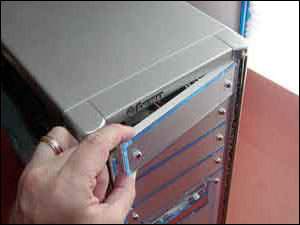
Gather up all your drives. Many cases use
removable drive rails or cages to house drives. Use the included screws to
attach your drives to the rails or cage, and slide them into the case. For
externally accessible drives such as a DVD recorder, you can save time by
installing one drive rail and sliding the drive in for a test fitting to
make sure that its front is flush with the case. When the drives are
installed, connect power and data cables to each one. Parallel ATA drives
use wide, flat data cables that can be installed only in the correct way.
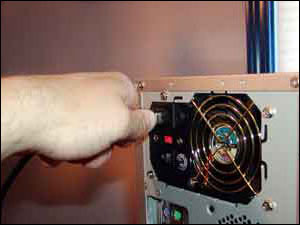
1. First, if your PC is running, shut it
down and turn off the power switch.
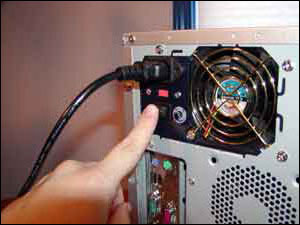
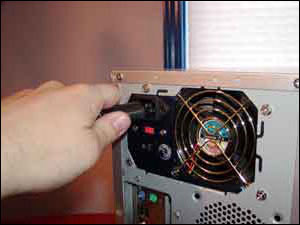
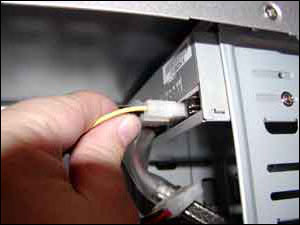
2. Next, remove the power cord just in
case - it’s an important safety measure.
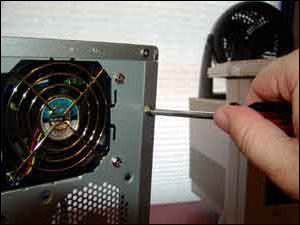
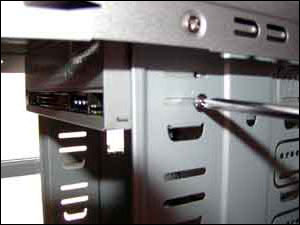
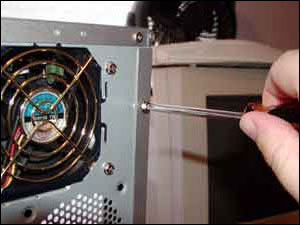
3. Now find and remove the screws
holding the case together.
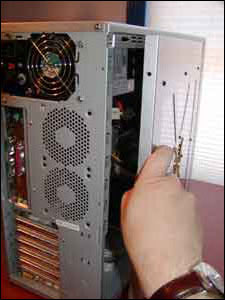
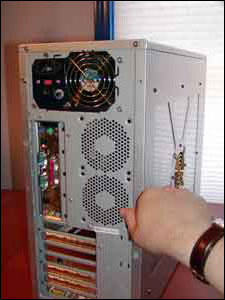
4. Next, remove the case cover or panel
from your PC.
5. Find the 5.25-inch external drive
cover. That’s where the drive will be installed. Remove the cover.
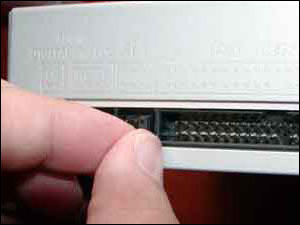
6. Before sliding the drive into the
drive bay, use the jumpers to set the drive to be either a master or slave.
If the drive will reside on its own IDE cable, select the master setting. If
the drive will be added to an existing IDE cable, choose slave.
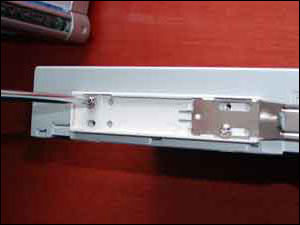
7. Note: if your drive bay requires
slide rails, attach the drive rails onto the sides of the drives.
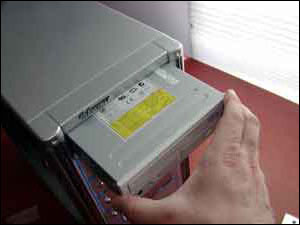
8. Next, Slide the drive into the drive
bay.
9. If the case does not use drive rails,
attach the drive to the bay using screws.
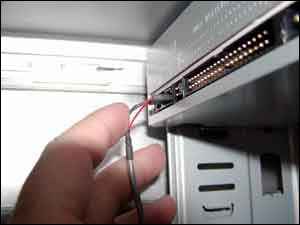
10. Attach the CD-Audio cable to the
connector on the drive.
11. Attach the other end of the CD-Audio
cable to the motherboard or audio card.
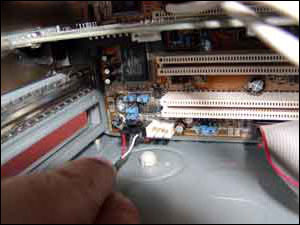
12. Next, plug the IDE cable into the
motherboard, if one isn’t already in place.
13. Plug the drive connector of the IDE
cable into the drive.
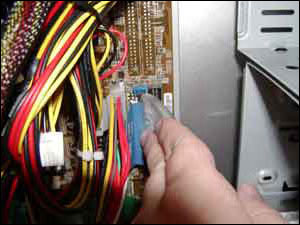
14. Attach the 4-pin power adapter in
the drive.
15. Replace the case cover or panel.
16. Attach the case cover or panel with
the screws.
17. Reattach the power cord to the
computer.
18. Finally, turn the power switch on
the power supply back on.
Now your drive is installed (physically) into your computer. When you power
up the system, it should detect the new drive.