|
| |
|
Tips
& Techniques For Building Your Own PC
|
|
|
 First
things first. What do you need to build a computer? Believe us, it's not as
complicated as it seems. Let's start with the case. The variety is staggering,
with hundreds of styles, shapes and sizes available. We recommend that you
look closely at the features. Some gorgeous PC
cases are nightmares to work with, or are cheaply built. Get the best case
you can afford, we recommend you ask for "tool-less" case design, which
enables you to click---open, click---closed. Most cases and motherboards use
the ATX Form factor, standardizing the sizes of the components and all of
the power connections. Speaking of power: Although many PC cases are sold
with a pre-installed power supply, check it carefully---your power
requirements may exceed the capacity of the pre-installed unit. How do you
know? Here's a quick guide: First
things first. What do you need to build a computer? Believe us, it's not as
complicated as it seems. Let's start with the case. The variety is staggering,
with hundreds of styles, shapes and sizes available. We recommend that you
look closely at the features. Some gorgeous PC
cases are nightmares to work with, or are cheaply built. Get the best case
you can afford, we recommend you ask for "tool-less" case design, which
enables you to click---open, click---closed. Most cases and motherboards use
the ATX Form factor, standardizing the sizes of the components and all of
the power connections. Speaking of power: Although many PC cases are sold
with a pre-installed power supply, check it carefully---your power
requirements may exceed the capacity of the pre-installed unit. How do you
know? Here's a quick guide:
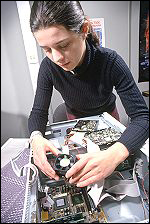
|
Component |
Wattage Required |
|
Motherboard |
15-30 |
|
Low-End CPU |
20-50 |
| Mid
To High-End CPU |
40-100 |
| RAM
|
7 per 128MB |
| PCI
Add-In Card |
5 |
| Low
To Mid-Range Graphics |
20-60 |
|
High-End Graphics |
60-100 |
| IDE
Hard Drive |
10-30 |
|
Optical Drives |
10-25 |
|
Do the
math. You may need to purchase a higher-output power supply for your new PC.
Once you've selected a case and power supply, be sure that you have the
following items:
- A set of screwdrivers (small, large, slot, Phillips), or a PC Tool Kit
- An anti-static wrist strap
- Needle-nosed pliers
- CPU (processor)
- CPU cooling fan and heat sink
- Sound Card
- Motherboard
- One or more hard drives
- Graphics card
- One or more RAM DIMMs (Memory modules)
- An operating system
That's
basically it. And these days, anyone can build or upgrade a computer. It's
really very simple and it can save you hundreds of dollars. Why build or
upgrade your own PC? If you're short on hard-disk space Add a new drive.
Getting creamed in the latest games because they run so slowly? Time for a
new graphics board. But maybe you need a whole new system. With just a
little more technical know-how than a typical upgrade requires, you can
build a PC yourself from handpicked parts. Obviously, determining which
parts to use---and getting the RIGHT parts---is critical to successfully
building the perfect PC. To get you started on the right track, we've
assembled a guide to the main components in a PC, including recommendations
for each part (based on what you intend to do with your machine). dollars. Why build or
upgrade your own PC? If you're short on hard-disk space Add a new drive.
Getting creamed in the latest games because they run so slowly? Time for a
new graphics board. But maybe you need a whole new system. With just a
little more technical know-how than a typical upgrade requires, you can
build a PC yourself from handpicked parts. Obviously, determining which
parts to use---and getting the RIGHT parts---is critical to successfully
building the perfect PC. To get you started on the right track, we've
assembled a guide to the main components in a PC, including recommendations
for each part (based on what you intend to do with your machine).
Building Your Own System
1. Before you dive in…
Before you
start the job, you have to take inventory of your parts. It does little good
to begin your build when you don't have everything you need. Once you've
determined you have everything you need, it's time to start! Make sure you
have plenty of working room and a few hours to proceed with minimal
interruption. Please note that carpeting represents some real dangers to
your computer. The carpeted surface has the potential to create static
electricity that can fry your components. An inexpensive antistatic wrist
strap (they are often priced at less than 6 bucks) is the perfect preventive
measure if you have no alternative to working on carpet. Remember, a bare
floor is always the best place to build your system. Now, grab hold of a
good set of screwdrivers, a pair of needle-nose pliers, and an antistatic
wrist strap, and make sure you're wearing your antistatic wrist strap (it
does you no good at all if you don't wear it!) Finally, download the latest
drivers from the vendors' Web sites for each component you'll be installing,
and copy them to a CD to avoid headaches later on; the drivers that come in
product boxes are often several versions out of date.
2. Dive in!…Installing the Motherboard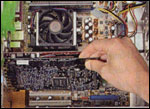
Here comes the fun part! Installing the motherboard. First, take the board
out of its packaging and put it on top of the antistatic bag it came in.
Remember, you always want to safeguard your components from potentially
hazardous static electricity. Before you secure the motherboard onto the PC
case, you should install the processor, heat sink and the memory modules on
it. If you aren't sure which socket is which, or what goes where, consult
your motherboard's user manual for guidance. User manuals are extremely
helpful, easy to read and include illustrations. First, lift the lever on
the processor socket so you can install the CPU. Carefully line up the pins
and place the chip in its socket; it will fit only when oriented the proper
way. An arrow or a missing pin on one corner of the chip will show you how
to line things up. Lower the lever to lock the CPU into place.
Next, follow the manufacturer's directions to install the heat sink
and the fan that will cool the processor. If you bought an OEM CPU and a
separate heat sink, you may need to spread a thin layer of the thermal
grease that came with the heat sink over the chip to ensure proper transfer
of heat (some heat sinks come with this grease already applied). Attaching
the clip that holds the heat sink in place may require a fair amount of
force. Again, the instructions that came with the heat sink will show you
how to know whether you've fitted it correctly. Plug the fan's power
connector into the proper connector on the motherboard.
TECHNIQUE: This part can get a little tricky. But stick with it
and you will have no trouble at all. In order to install the memory modules,
insert them into the proper sockets and push down firmly but evenly until
the clips on both sides of the socket pop into place. If your motherboard
supports dual-channel memory, consult the user manual to determine which
pairs of RAM sockets you should use. The motherboard and the CPU are the
brain and nerve center of your PC, so selecting these components might just
be the most important decision you'll make.
TIP: Choose the processor first: Despite running at slower clock
speeds than their Intel-based rivals, AMD-based systems have maintained a
significant performance lead in documented benchmark testing for a while
now. At the high end, Athlon 64 FX CPUs are the fastest around. There are
positive and negatives to each CPU, so do a thorough investigation before
making your buying decision. Remember, an informed buyer has a much higher
probability of being a satisfied one.
TIP: Choose the motherboard after selecting the processor:
The
processor you choose usually determines which motherboard you select:
Motherboards are designed to work with specific CPUs, indicated by the type
of socket that the processor fits into. Socket A, Socket 939, and Socket 940
are designed to work with Athlon processors, while Socket 478 and the new
LGA socket 775 are for Intel CPUs. Many dealers offer bundles consisting of
a processor, a motherboard, and memory; these can be a good way to save some
money. The system chip set (the chips that pass data between the peripherals
and the CPU) is the other component that differs among motherboards; it
determines which integrated components (graphics, sound, Ethernet, etc.)
will be included. Though integrated graphics aren't generally as good as
dedicated cards, they're usually adequate for simple tasks.
3. Placing the Motherboard into Your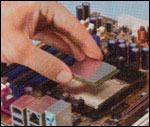 Case Case
First, a word about cases. The right one can make working with your system a
dream, but picking the wrong one will come back to haunt you. Though you can
find a case plus power supply for less than $50, we recommend that you
invest a bit more to obtain a case that will last through many upgrades and
that you'll enjoy looking at.
Case Form factor: Most cases and motherboards use the ATX form
factor--a set of design standards that specify things such as the size of
the motherboard and the connectors on the power supply. It's critical that
your motherboard match the form factor of your case. Be aware of other
standards--for example, Shuttle-style cube-shaped systems that come with
their own custom motherboard. Check carefully and note the form factor when
shopping.
Case Construction:
Steel cases
weigh more than aluminum ones, they cost less, and they muffle the noise
from components such as hard drives better than aluminum cases do. On the
other hand, aluminum boxes tend to be more stylish, and they are certainly
easier to carry around.
Case Convenience: Even the best-looking case will seem ugly if
installing your components becomes a pain. Look for helpful features like a
removable motherboard tray, tool-less drive carriers, and multiple fan
locations for cooling the system.
TIP: Does this PC case include a power supply?
Cheaper
cases often come with cut-rate power supplies that may not be up to the task
of powering a high-end PC. Some expensive cases don't come with a power
supply, which lets you choose your own. If you've added a lot of new
components to your PC, you may be overtaxing your existing power supply, so
look at getting a bigger, better one. Power supplies can cause
problems--including random crashes or even component failure--if they are
asked to produce more power than they are designed to generate. Reputable
manufacturers will typically include a chart of acceptable components.
Memory: The More, The Merrier.
Because it's an easy upgrade to perform and can significantly improve
performance, boosting a PC's RAM is one of the most popular hardware
enhancements people undertake. This 5-minute procedure can let you keep more
programs open, accelerate memory-hungry graphics programs and games
dramatically, and sharpen your PC's responsiveness. The memory modules that
most recent systems accept are 184-pin DDR DIMMs of varying speeds, such as
DDR333 or DDR400; the number describes the RAM's clock speed. You'll
sometimes see memory referred to by the bandwidth it offers, such as PC2700
(DDR333) or PC3200 (DDR400). The type you should buy depends on the
motherboard and processor you choose: For best performance, opt for the
fastest type of memory module that works with both. A new type of memory
(called DDR2) offers even speedier performance, but this can be used only on
new systems equipped with the latest Intel chip sets.
TIP: Get at least a gigabyte:
Sure, you
can save money by installing less, but 1GB of RAM puts you comfortably above
the point at which most speed gains occur, and it should enable you to run
the most demanding applications and increase the speed of your system when
you keep more than one program open at a time.
TIP: Opt for dual-channel if possible: If your motherboard
supports it, use dual-channel memory. This type of memory boosts performance
by increasing the speed at which data can be read and written. But for it to
work, you have to install matched RAM modules in pairs. Some early
dual-channel boards came with only three RAM sockets. If two of those
sockets are already filled, you must either upgrade with a single DIMM (and
lose some performance) or replace your two existing DIMMs.
TECHNIQUE:
Some PC
cases have a removable motherboard tray. If yours does, remove the screws
holding it in place and pull it out of the case. Note the pattern of the
holes in your motherboard, and screw brass standoffs into the motherboard
tray or into the PC case in the correct locations. Check the layout of the
sockets on the motherboard, and confirm that the ports on your motherboard's
back panel match the holes on the I/O shield that is installed in your case.
If necessary, remove the old I/O shield by tapping it firmly a few times
with the butt-end of a screwdriver, and then replace it with the shield that
came with the new motherboard.
TECHNIQUE: Carefully position the motherboard on top of the brass
standoffs, line up all the holes, and use the screws that accompanied the
case to fasten down the motherboard. If you are using a removable tray in
your system, slide the tray and motherboard back into the case and then
secure the tray.
4. Connecting The Color-Coded Power
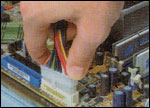 Cables. Cables.
Obviously, making the proper connections is crucial to your successful PC
system build. Fortunately, manufacturers now provide color-coded power
cables to make the job easy. First, plug the large ATX power connector for
your power supply into the matching port on your motherboard. Next, locate
the smaller, square processor power connector ( you can't miss it - it's the
one sprouting the yellow and black wires) and attach it to the motherboard.
Note: your connector is usually located near the processor. Now it's time to
get out your motherboard user manual and find the description about
front-panel connectors. Be forewarned - you're going to be doing work now
that requires attention to detail and can be quite frustrating if you don't
go into it with the right attitude. Okay, now that we've warned you, attach
each of the tiny leads from the power and reset switches, the hard-disk
activity lights, the PC speaker, and any front-panel USB and FireWire ports
to the corresponding pin on your motherboard. If you have to, don't be
afraid to use your needle-nose pliers.
5. Install the Video Card
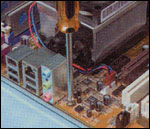 (and
test it.) (and
test it.)
Close your eyes and imagine the incredible video you're going to see once
you're brand new, custom-built PC is up and running. Okay, open them up
again and let's get to work. It's time to install the video card so you can
see those great images. First, remove the backplane cover for your AGP or
PCI Express X16 slot, install the graphics board in that slot, and then
secure the card with a screw. Some graphics boards require a dedicated
connection to your PC's power supply. If yours does, you should plug in the
correct power connector now. Connect a keyboard, mouse, monitor, and power
cable to your computer and turn it on. If the internal fans begin to whir,
the system beeps, and you see the machine starting to boot, power down (by
holding the power button for 5 seconds) and continue building. If nothing
happens, back up a step and recheck all of your connections. Make sure that
both the processor and the memory are properly seated, and recheck those
minuscule leads connecting the motherboard to the power and reset switches.
Graphics boards have become the high fashion of computing. As new, super
fast graphics chips emerge every six months, trendy techies don't want to
get caught checking out the latest 3D game with a board that's "so last
season." But you needn't spend a fortune to get good performance.
TIP: Don't pay for features you don't need: At the high end ATI
and nVidia have been flirting with designer pricing, as loaded enthusiast
parts go for upward of $500. At those prices, only the most hard-core gamers
will pay to keep up with the latest styles; but even if your needs are
relatively modest, you can easily find an affordable board that boosts your
PC's 3D graphics speed. If you're doing some light photo-editing, gaming or
just surging the web, a $50 or $75 video card is more than adequate. Look
for models that have 64MB or 128MB of dedicated memory.
TIP: Make sure you get the features you want: Most graphics boards
today let you connect a second display to your PC. If you'd like to use your
PC to record TV, a board with an integrated TV tuner (like the ATI
All-In-Wonder line) is a good choice. EVGA (www.evga.com) makes a competing
set of TV tuner-equipped graphics boards based on nVidia's Personal Cinema
chip set.
TIP: PCI Express--the next generation of video display:
The latest
graphics cards now use PCI Express, an improved version of the AGP slot on
most PCs. Our tests of new PCI Express graphics cards detected no
significant speed gains as a result of upgrading from AGP to PCI Express,
though that will surely change as graphics chip speeds increase and as games
get more complex.
Gamers Agree: Don't Skimp On The Video Card.
An integrated graphics processor is like a suit bought at Wal-Mart: It does
the job, but it doesn't look great. The PC World Test Center tested a PC
with integrated graphics on a number of 3D games, and found them virtually
unplayable. But when we installed a $220 Radeon 9800 Pro graphics card, the
games ran much faster. This upgrade isn't difficult. First, find out who
makes the graphics chip you already use: Right-click your desktop, choose
Properties, and select the Settings tab. Your graphics board will be listed
under 'Display'. All graphics cards based on chips from NVidia now use the
same set of drivers, so if you're upgrading from one NVidia-based card to
another, download and install the latest NVidia drivers. The same is true
for ATI-based boards. If your new card switches graphics chip brands, you
should uninstall the graphics drivers before you upgrade.
Shut down your PC, unplug it, and open the case. Remove the old graphics
board (if any), insert the new board into its slot, and secure it with a
screw. Plug your PC back in, turn it on, and follow the manufacturer's
directions to set up the new graphics board.
6. Installing the
 Drives Drives
Now it's time to install your drives. It's an easy process, but again
requires some attention to detail. Gather up all your drives. Collect the
hard disk, the optical drives, and the floppy drives, but be certain to make
any necessary changes to jumpers on the drives before mounting them in the
case. A two-drive system (one or two SATA hard drives, plus one parallel ATA
optical drive, for example) is easy to set up; the SATA drives are jumper
less, and the optical drive can be set as master on its own parallel ATA
channel. Many cases use removable drive rails or cages to house drives. Use
the included screws to attach your drives to the rails or cage, and slide
them into the case. For externally accessible drives such as a DVD recorder,
you can save time by installing one drive rail and sliding the drive in for
a test fitting to make sure that its front is flush with the case.
When the drives are installed, connect power and data cables to each one.
Parallel ATA drives use wide, flat data cables that can be installed only in
the correct way. Floppy drives use a similar but smaller cable; SATA drives
use a thin, 1cm-wide data cable. SATA drives use a new type of power
connector that many power supplies don't come with. Fortunately, many
motherboards ship with adapters for converting a standard four-pin power
connector to a SATA power connector. Some drives ship with both the older
connector and the SATA power connector. In that case, use one power
connector or the other, but not both. The capacity of hard drives continues
to increase: You can now hold 400GB of data on a single drive, which is
great news for digital media pack rats and video editors. But though you
don't have to compromise on the drive's size, you still have a few choices
to make when picking a hard disk.
Upgrade Option: RAID RAID, which stands for Redundant Array of
Independent Disks, lets you use multiple hard drives to boost disk speed or
to keep a mirrored backup of your data in case a drive fails. Either setup
requires multiple identical drives, and configuring them calls for a little
mental gymnastics. An increasing number of systems on our Top 15 Desktop PCs
chart use a configuration called RAID 0, which can significantly increase
system speeds for data reading and writing. If you would like to try it,
first select a pair of drives that match the storage capacity you want. With
120GB hard drives available for under $90 and with RAID support included on
most new motherboards, RAID can be a great value.
Upgrade Option: Serial ATA; Even bargain-priced motherboards now
include SATA support, and going with an SATA drive will make your system
easier to set up and your drive simpler to move to a future PC when the time
comes. If you're looking to boost the storage capacity of an older PC, the
answer gets more complex: To use a SATA drive, you must add a SATA
controller card. Many SATA controller cards give you the option of adding
RAID support to your system, too. Is it worth it? Well, if you do a great
many tasks that involve a lot of disk access (such as video editing), it can
be. But otherwise, just add a second parallel ATA drive.
Transferring Your Data
When you add a new hard drive to an older PC, it's almost always faster than
the drive already in use. But simply installing the new drive on your PC
will strand your OS on the slower drive, forfeiting some benefits of
upgrading. Make sure you use the new, faster, hard drive as your boot drive.
Retail hard-drive upgrade kits usually come with software that you can use
to clone your existing drive to the new one, making the faster drive your
boot drive. But before you do this, pause and consider whether it may be
time to start over. Over time Windows fills up with discarded files,
drivers, and other crud. Adding a hard drive can be just the excuse you need
to reinstall Windows from the system restore CD that came with your PC.
CD, CD-RW And DVD
Whether you
upgrade or build a new PC, adding a fast optical drive can increase its
flexibility. And even if you're on a budget, drives that read and burn any
format under the sun won't break the bank.
TIP: Get An "All-In-One" Drive: No need to worry about whether
your drive supports DVD+RW or DVD-RW-for around $90 you can get an 8X DVD
combination drive that writes to all major formats of rewritable DVD. Burn
DVD+R and -R discs at 8X, both rewritable DVD formats at 4X, CD-Rs at 40X,
and CD-RWs at 24X. You'd save only about $40 by going with a simple
CD-RW/DVD-ROM combo drive, so you get more value with a DVD burner that does
it all.
TIP: Burn Speed
Even
no-longer-top-of-the-line 8X DVD burners can write an entire disc in less
than 10 minutes, and CD burning speeds these days are sufficiently fast at
the upper end that the difference between 48X and 52X is negligible.
Consequently, if you're on a budget, there's no reason to pay a premium for
a 12X or 16X DVD burner or to insist on buying the fastest CD-RW drive you
can find.
TIP: Do not use bulky "Ribbon" cables: The flat, wide ribbon
cables that Parallel ATA drives use to carry data can restrict airflow
inside your case, robbing your system of valuable cooling; and functionality
aside, they're just plain ugly. Rounded data cables available at your local
PC store look much nicer, and they don't impede airflow.
TIP: The Storage Secret: Dual-Layer DVD "DL"
What's 12
centimeters in diameter and can hold 8.5GB of data? A dual-layer DVD disc,
that's what. Most stand-alone DVD players can play the dual-layer discs that
these drives burn, boosting the amount of video that will fit on one disc.
You'll pay a small price premium for early dual-layer drives, however, and
compatible media may be hard to find at first. In addition, writing to
dual-layer discs is slower than writing to single-layer ones--2.4X for the
former, as opposed to 8X, 12X, or 16X for the latter. We recommend waiting
until the prices of drives and media fall before switching to dual-layer
unless you need the extra storage space.
TIP: One Cable, Two Drives: So-Called "Master And Slave."
Adding a drive to an older PC isn't always a question of simply plugging it
in. Most older PCs use parallel ATA technology, where two drives share one
cable (this is referred to as a channel; most PCs come with at least two IDE
channels for a maximum of four drives). Setting a jumper designates each
drive as either a master or a slave, which permits a single cable to connect
two drives to one IDE channel. The jumper settings for each designation are
usually labeled on the drive itself. A few simple rules should guide your
configuration choices. If possible, each drive should sit on its own IDE
channel configured as a master drive. If you have two drives on one channel,
always make the faster drive the master drive. For example, suppose that you
wanted to add a second hard drive and a DVD burner to a PC equipped with one
hard drive and one CD-RW drive. In that case, you would want to set the new,
faster hard drive as master on the primary IDE channel. Your older hard
drive should be the slave drive on the primary channel, with the two optical
drives as master and slave on the secondary channel.
7. Install the Add-In
 Cards Cards
Take another deep breath. You're getting close to the end. Perhaps you might
take a short break, check out all the great things you've done and get ready
for the home stretch. Now, for each add-in card, you must choose a free PCI
slot. Next, remove its backplane cover to allow access from the rear of the
case. Carefully position the card above the slot, and press down firmly to
seat the card. Secure the card with a screw. Many motherboards have
additional sound connectors or ports housed on small add-in boards. Some of
these plug into slots on the motherboard; others screw into the back of the
case in place of slot covers. Usually the additional ports are not essential
to your PC's operation. For example, if you install a sound card, you do not
need connectors to the motherboard's built-in sound chip. Although we may
sound like a broken record in saying this, once again check your motherboard
manual to determine what each of these boards does.
8. Turn It On (and check your PC Set up)
Having fun yet? Of course you are. It's time to get on with the business of
turning on your system and checking out your PC set up. So plug in the
keyboard, mouse, and monitor to the appropriate ports on the back of the PC.
Plug the power cord back in, and turn the machine on. Enter your PC's BIOS
setup screen by pressing the indicated key (often Delete) as the machine
boots. Menu options will vary from board to board, but they share the same
general categories. Set the date and time, and then look for a setting that
deals with PC health status and monitoring. That choice should bring up a
screen showing processor and case temperature. Watch the processor
temperature for a few minutes. It should stabilize at a level between 30°C
and 50°C. If it keeps increasing, your heat sink probably isn't installed
properly. Power down and check to see whether the heat sink is securely
attached and making good contact with the processor. Next, find the section
of the BIOS setup that determines the order in which your machine checks
drives and devices for one it can boot from. Set CD-ROM to the highest
priority so that your machine will boot from the Windows installation CD.
9.
Installing the Operating System
Now you are just two simple steps away from running your very own
custom-built personal computer. All that's left is to install the operating
system and then update your drivers and install the programs. First, place
the Windows installation CD in your optical drive, reboot the PC, and allow
the system to boot off the disc. Windows setup should begin. Early in the
process, Windows will ask you whether you need to install a third-party SCSI
or RAID driver. If you're using a RAID setup, press F6 when this message
appears; then insert the floppy containing the appropriate driver when it is
requested. If your machine hangs while installing Windows, there may be a
problem with one of the components. Try removing everything except the core
components (motherboard, processor, one memory module, and hard drives);
then, once you've successfully installed Windows, begin reinstalling each
component one by one to isolate the source of the problem.
10. Last, But NOT Least: Update Drivers and Install Programs
Once you've got Windows up and running, the last step in this exciting,
build-it-your-self process is to update your hardware drivers. This is not
an optional procedure - you MUST do it. Insert the CD with the latest
drivers (from step 1) and install them, starting with those for the
motherboard and graphics card and then moving on to less critical ones like
mouse and sound card drivers. (Windows comes with basic drivers to get you
up and running.) Several reboots later, you should have a shiny new PC!
Next, get your network connection up and running, install a firewall, and
download the latest Windows patches. Finally, make sure that everything runs
okay, and then back up your system. That way you'll have a clean, current
image of Windows to go back to if serious trouble arises in the future.
You're installing. If these steps check out and you're still experiencing
spontaneous reboots, your problem may be one of the following situations.
Over clocking: We do not recommend over clocking. Memory Timing: The fix? Go
into your BIOS and set your memory on "Auto" or at a more conservative
setting and see if the reboot problem goes away. Outdated BIOS: Make sure
you have the latest BIOS for your board. You can determine if your CPU is
supported by browsing the BIOS updates of the motherboard's manufacturer. If
you're running a Pentium 4 Extreme Edition and notice that it's only
supported with the latest BIOS updates, you may have located the problem!
Inadequate Power: If you've made significant component upgrades---with the
exception of the power supply---your power supply may be overstressed or
failing due to heat or age. Finally, if you've migrated your OS and other
files from machine to machine to machine, it may be time for a clean
install. |
|